
Summary
Getting started with Shopify is not just about registering a store, but also making basic decisions that influence the further launch: what products to sell, to whom exactly, how to design the store, and how to accept payments.
This article provides a practical sequence for starting: from choosing a product and target audience to adding products, connecting a domain, and setting up payment methods.
Who this article is for
- For those creating their first Shopify store from scratch.
- For sellers who want to understand the correct sequence of launching.
- For entrepreneurs testing a niche, target audience, and the first product.
Essence of the article
Main idea: a successful start of a store on Shopify begins with a clear connection “product → target customer → store theme → product page → domain → payment”, and not just with technical account registration.
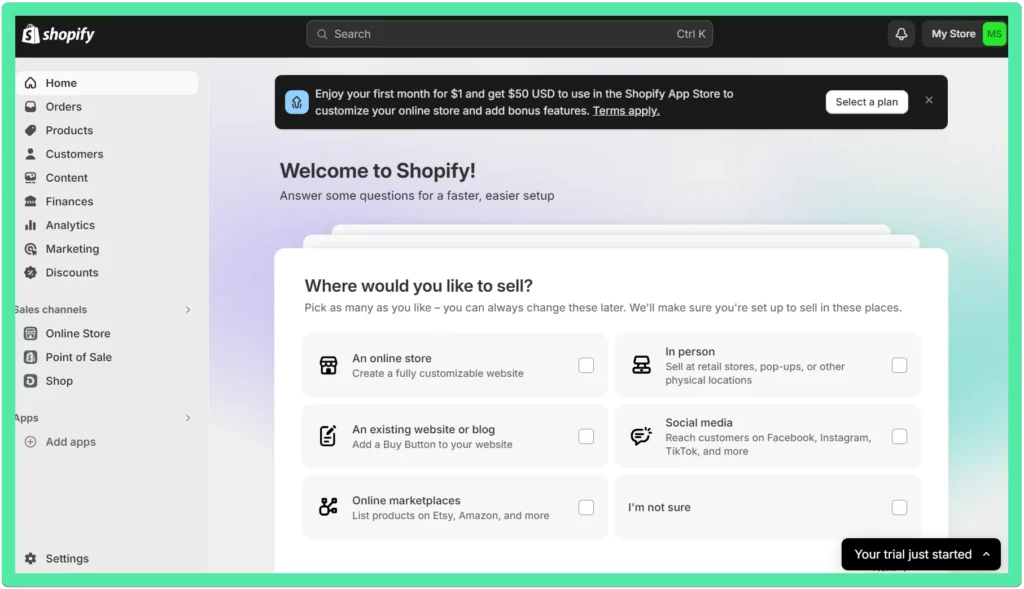
What needs to be done in the initial stages of launching a Shopify store
| Stage | Seller’s actions | Result |
|---|---|---|
| Product selection | Selects a product and forms a basic offer | Clear understanding of what exactly to sell |
| Defining the audience | Describes target buyers and their motives | Easier to choose style, messages, and theme |
| Theme selection | Chooses a basic or paid Shopify theme | Store structure and appearance are formed |
| Adding a product | Fills in description, snippet, photos, and delivery info | The first product page is ready |
| Connecting a domain | Links a custom domain to the store | The store has a branded address |
| Connecting payment methods | Configures Shopify Payments or another solution | The store is ready to accept orders |
First Steps Checklist in Shopify
- Select a product that can realistically be tested and delivered.
- Describe 2–4 key segments of target customers.
- Choose a store theme suitable for your product type.
- Add your first product with photos, description, and SEO snippet.
- Set up basic delivery logic.
- Connect your own domain.
- Activate a payment method for customers.
Product for sale
As you remember, I registered the domain mysteryboxx.shop, and the product I intend to sell is the so-called surprise boxes, mystery boxes. In the USA, you can order pallets with lightly used inexpensive goods in excellent condition from resellers, usually assorted items from Amazon warehouses. These can be some leftovers, returns, undelivered goods, and others. Amazon sells such goods in entire trailers for 10% of the retail price, and resellers sell these trailers in pallet loads at slightly higher prices. By purchasing a pallet as needed, we will put such goods into small boxes and sell them as mystery boxes. Thus, our product is boxes with a profitable set of unknown items, with a total value lower than the retail price on Amazon, making the purchase of a mystery box very advantageous.
Target customer
It is essential to draw a picture of your target buyers and keep it constantly in front of you. Currently, we have four such target buyers (perhaps we will discover more later):
1. The азартний гравець. He is curious about what he will get in the box, and he hopes to win the jackpot: the box will contain items he needs at half price, or maybe a third of the retail price. Or maybe there will be an iPhone. But overall, excitement and curiosity are the main characteristics of this type of buyer.
2. An extremely frugal person who will find a use for all unnecessary things just because they were cheaply acquired.
3. A spendthrift who tries to prove to himself and others that he makes very profitable purchases and knows how to save by buying various products with significant discounts.
4. An entrepreneur or owner of a small private shop of all sorts who would like to replenish their assortment with a small variety of goods.
Theme selection
The default basic theme is called Dawn. I suggest starting with it. If we find that it is not good enough, we will choose another one (there are thousands of them). Generally, paid themes differ not so much in design as in built-in features.
If you are seriously considering purchasing a paid theme, I recommend the Booster theme. I have reviewed dozens of paid themes, and this one is not only the fastest, but also includes various services worth $200+ per month, while Booster costs a one-time fee of $398.00 (sometimes they have a sale, and it costs even less), which pays off within a month.
We will still start with the basic theme since our product has few sizes, variations, and related products.
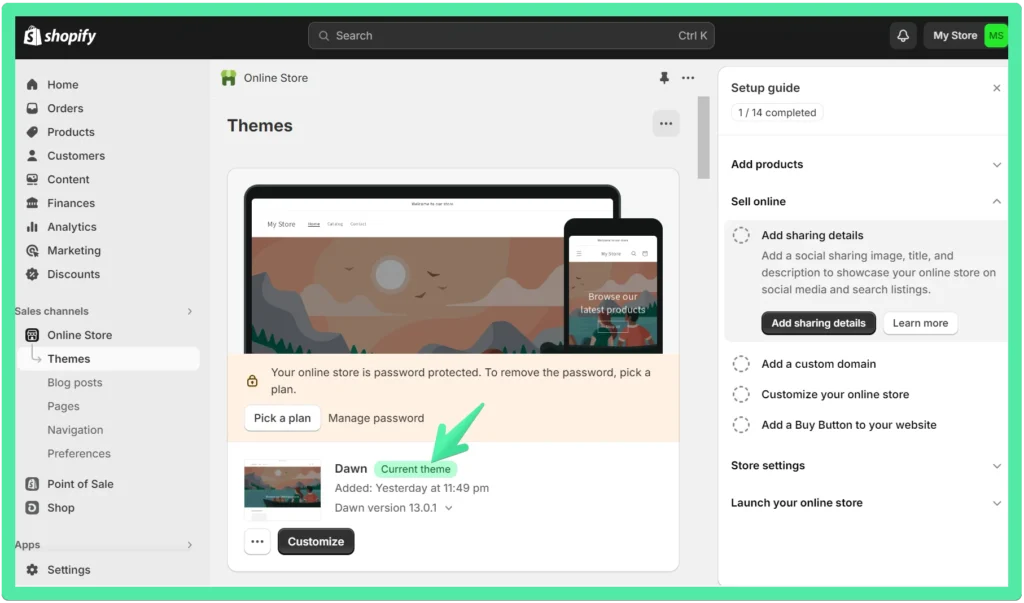
The online editor will help us customize the theme to our needs. In this article, we will not dwell on this in detail, but move on to adding our first product.
Add product
There are different ways to add a product, but I will add it manually by uploading a pre-prepared description and photos. Things to pay attention to:
1. You can generate the product description using AI. Do not do this! Today, Google easily detects machine-generated text, and your site could be banned. It’s better to write the description in the language you are fluent in and translate it into English using a translator Deepl. If you have no idea what to write about, you can ask AI to create a plan and main points for your product description.
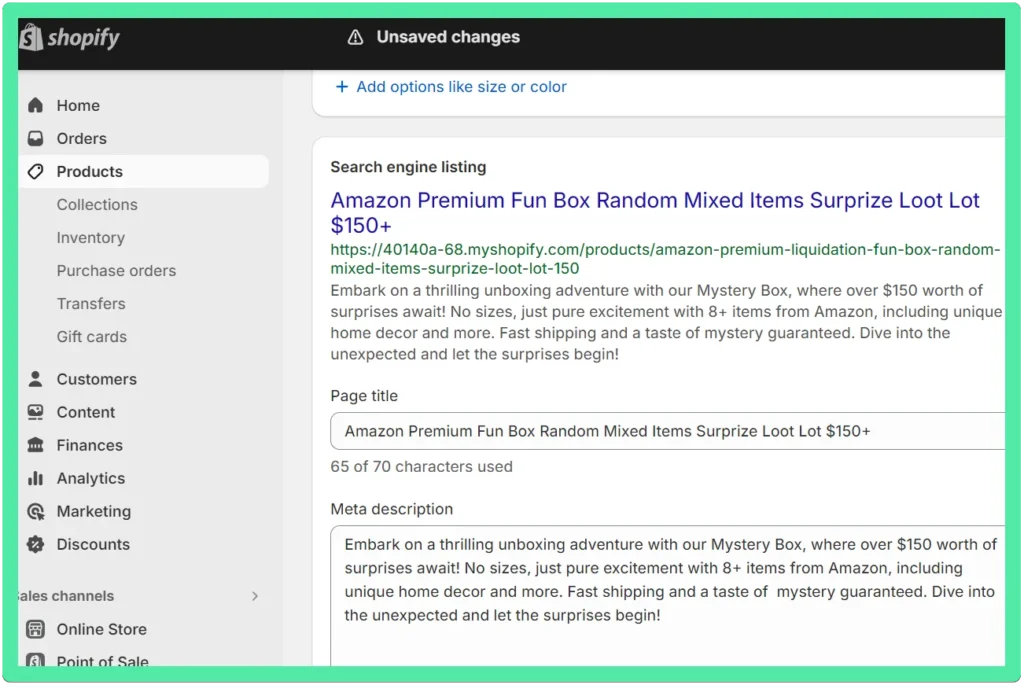
2. Editing the snippet – how the product appears in Google. The description will need to be shortened to 320 characters.
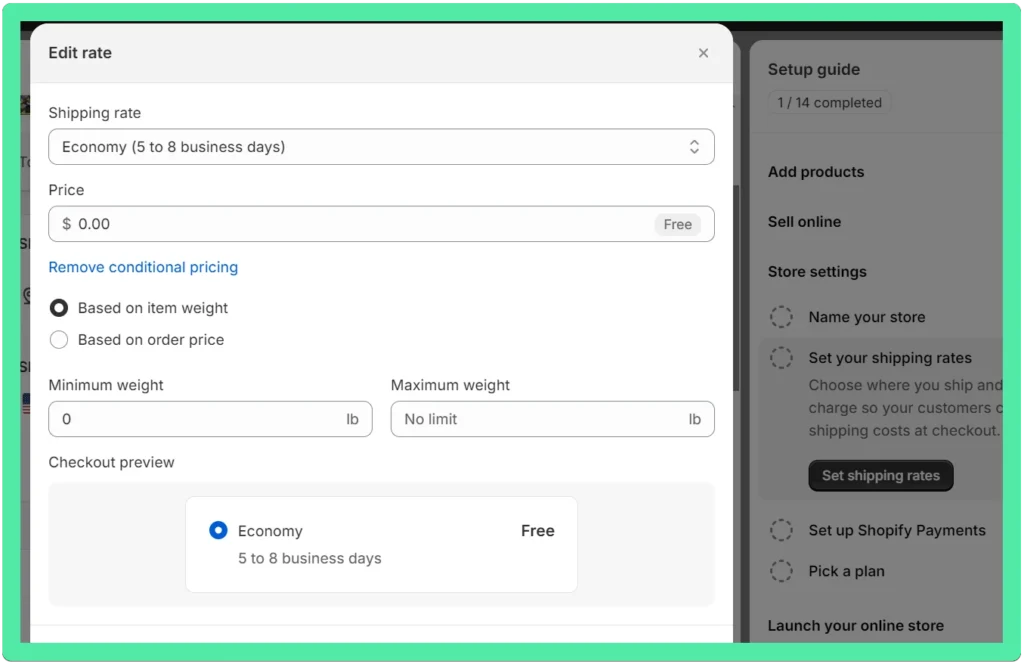
3. Shipping cost. By default, Shopify is set up for shipping only within the USA. How to set up shipping from Ukraine worldwide is a topic for a separate article. I will now set up the simplest option – shipping within the USA by a single method, and free of charge (i.e., included in the product price).
Domain attachment
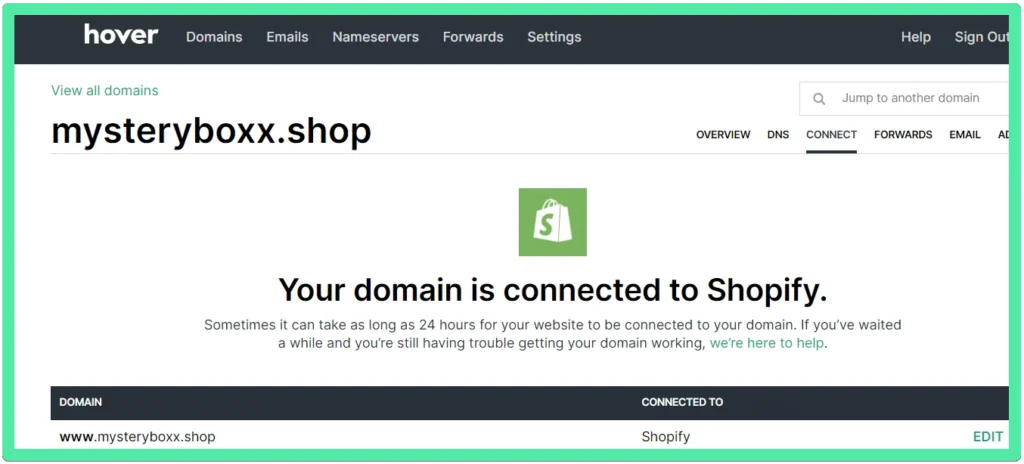
As you remember, I bought a domain on Hover. In the Hover personal account, I clicked on the Shopify icon. Immediately, a message appeared that the domain has been connected (even though I haven’t done anything in the Shopify account yet):
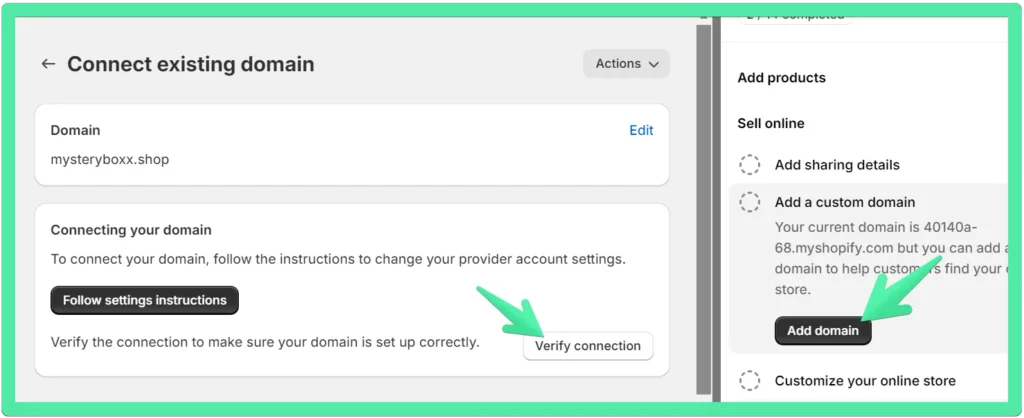
In the Shopify personal account, I clicked on Add Domain, entered the name of my domain, and then simply clicked on Verify Connection.
After that, my domain immediately joined the store. That simple:
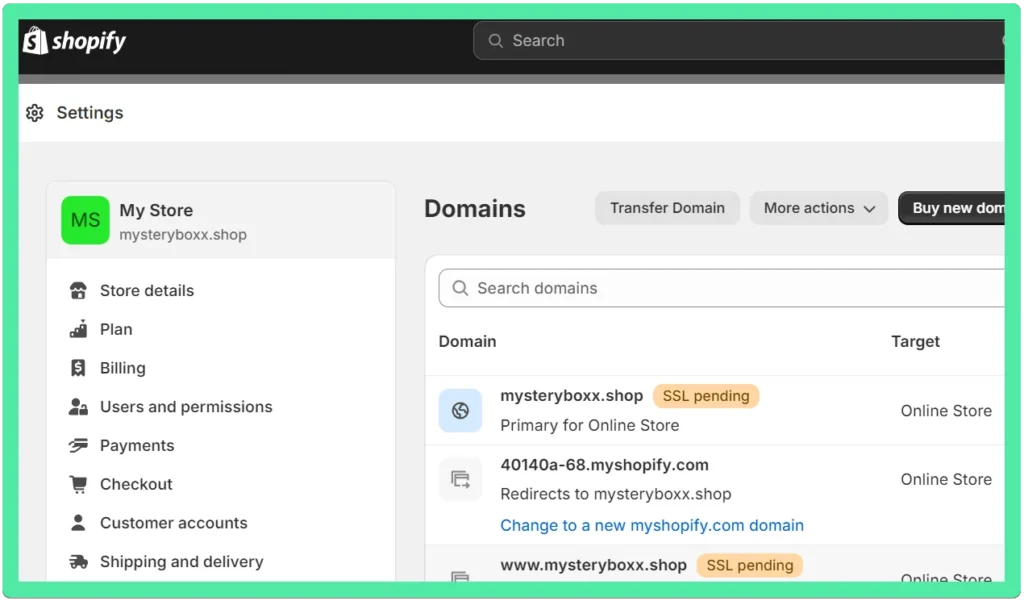
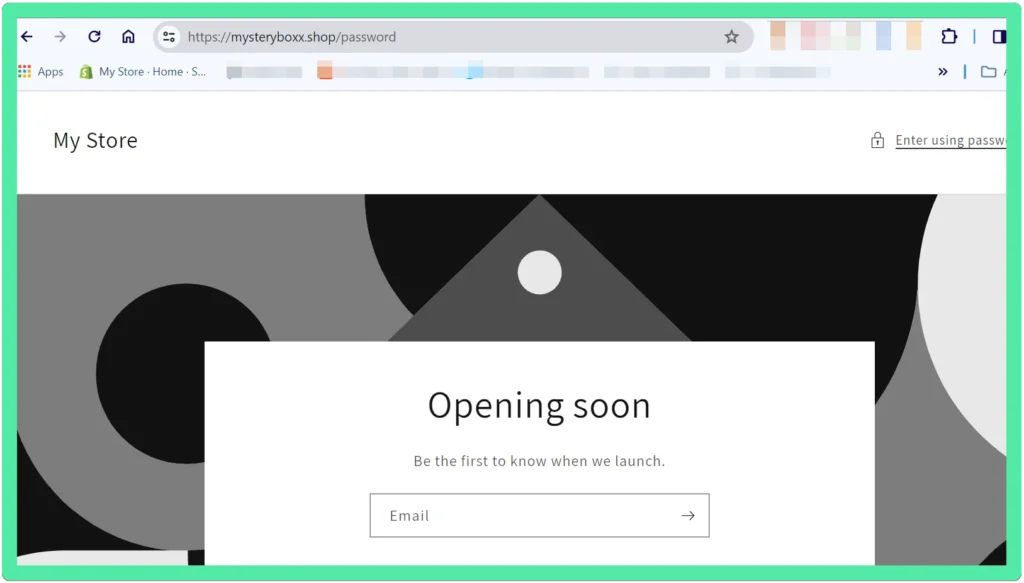
After 2 minutes, the SSL certificate was installed, and I entered the store’s address in the search bar in a new window – the address worked:
Enabling payment methods for customers
If Shopify Payments, Stripe, and PayPal are not available in your country, you should fill out an application to connect your store to the Western Bid platform, and we will connect your store to accept payments within 1-2 business days. You will be able to receive payouts from Western Bid in a way that is convenient for you.
I, being in the USA, will simply connect Shopify Payment.
Continuation follows.
Key Takeaway
Launching a Shopify store becomes much simpler when you first identify the product and the customer, and then move on to design, domain, and payments.
Frequently Asked Questions
Where to start creating a store on Shopify?
Where to start creating a store on Shopify?
Start with basic solutions: choose a product, understand who you’re selling it to, select a store theme, add your first product, and then connect a domain and payment methods.
Why is it important to define the target customer right away?
Why is it important to define the target customer right away?
The style of the store, product presentation, arguments in the description, choice of theme, applications, and marketing messages depend on the target audience. Without this, the store appears vague and less convincing.
Which Shopify theme is better to choose at the start?
Which Shopify theme is better to choose at the start?
For the initial launch, a basic theme will suffice if you have a simple product without a large number of variations. Paid themes can offer additional features, but they are not always necessary at the first stage.
How to correctly add your first product in Shopify?
How to correctly add your first product in Shopify?
You need to prepare photos, a clear description, a short SEO snippet for Google, the price, and the delivery logic. The product page should immediately explain the value of the offer for the customer.
What is a snippet in Shopify and why is it important?
What is a snippet in Shopify and why is it important?
Snippet — is a short text that can appear in Google. It affects how the product looks in search results, so it should be concise, clear, and relevant to the user’s query.
When to connect a domain to a Shopify store?
When to connect a domain to a Shopify store?
The domain should be connected at an early stage, once you have established the basic structure of the store. This gives the brand its own address and makes the store look more professional to the customer.
What’s Next
After the initial steps in Shopify, it’s time to fully populate the store, set up delivery, test conversions, and launch advertising.
Contact the Western Bid team if you need assistance with payment integration, launching your Shopify store, or preparing for international sales.


